
INDIVIDUAL GUIDES
Virtualization
This page will help you enable Virtualization on your system. By default, Virtualization is not enabled, and you need to enable it manually for our software to run smoothly.
🔍 Checking Virtualization Status
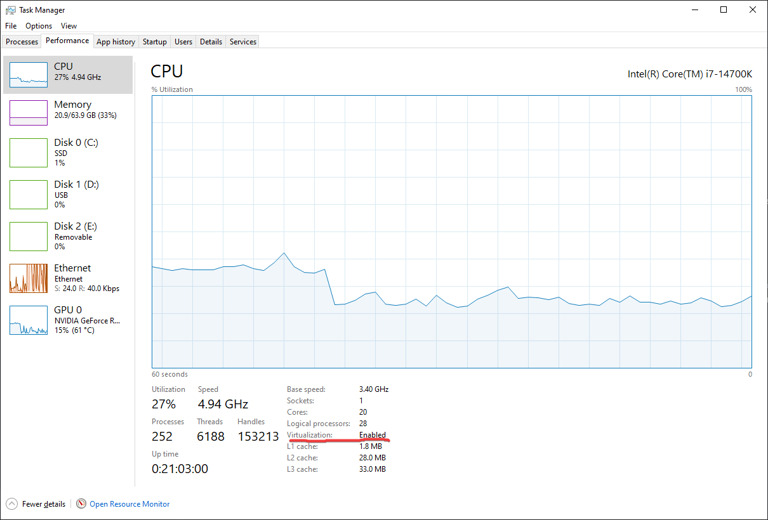
- Open Task Manager by pressing Ctrl + Shift + Esc.
- Navigate to the Performance tab.
- Look for the Virtualization status on your system.
- If enabled, you can move to the next page.
- If Disabled, follow the steps below to enable it in your BIOS.
🖥️ Finding Your Motherboard Model
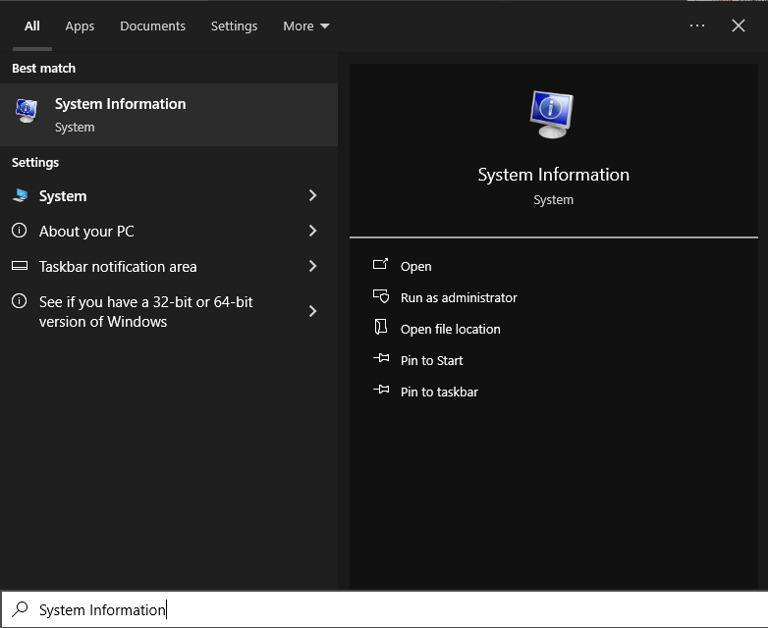
To enter your BIOS settings, you first need to know your motherboard model:
- Open the Windows search bar and type "System Information".
- Open the System Information application.
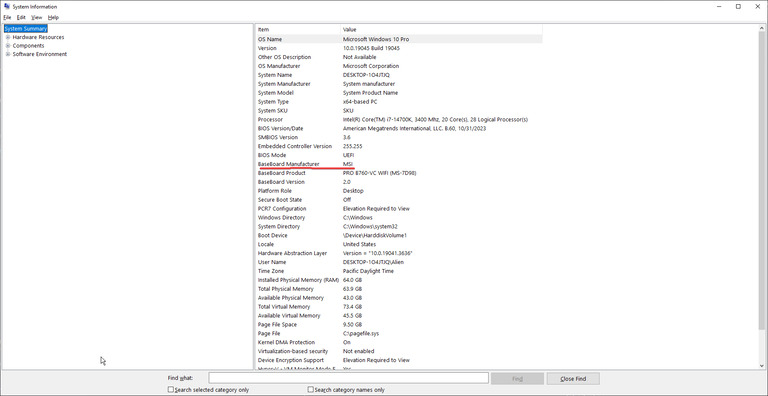
- Look for the fields labelled BaseBoard Manufacturer and BaseBoard Model.
🛠️ Enabling Virtualization
- Restart your PC and enter the BIOS setup:
- Common keys to access BIOS are Del, F2, or Esc (varies by manufacturer).
- Refer to your motherboard model to identify the exact steps. You can search online for "how to enable virtualization for [your motherboard model]".
Different BIOS
- For Intel Users:
- Go to the Advanced tab in BIOS settings.
- Select CPU Configuration.
- Enable Intel Virtualization Technology.
- Save changes and exit BIOS.
- For AMD Users:
- Go to the Advanced tab in BIOS settings.
- Select CPU Configuration.
- Enable SVM Mode.
- Save changes and exit BIOS.
Still need help?
Open a support ticket and include your order details, a screenshot, and the exact issue.
Open support